
Starbucks Holiday Cold Cups
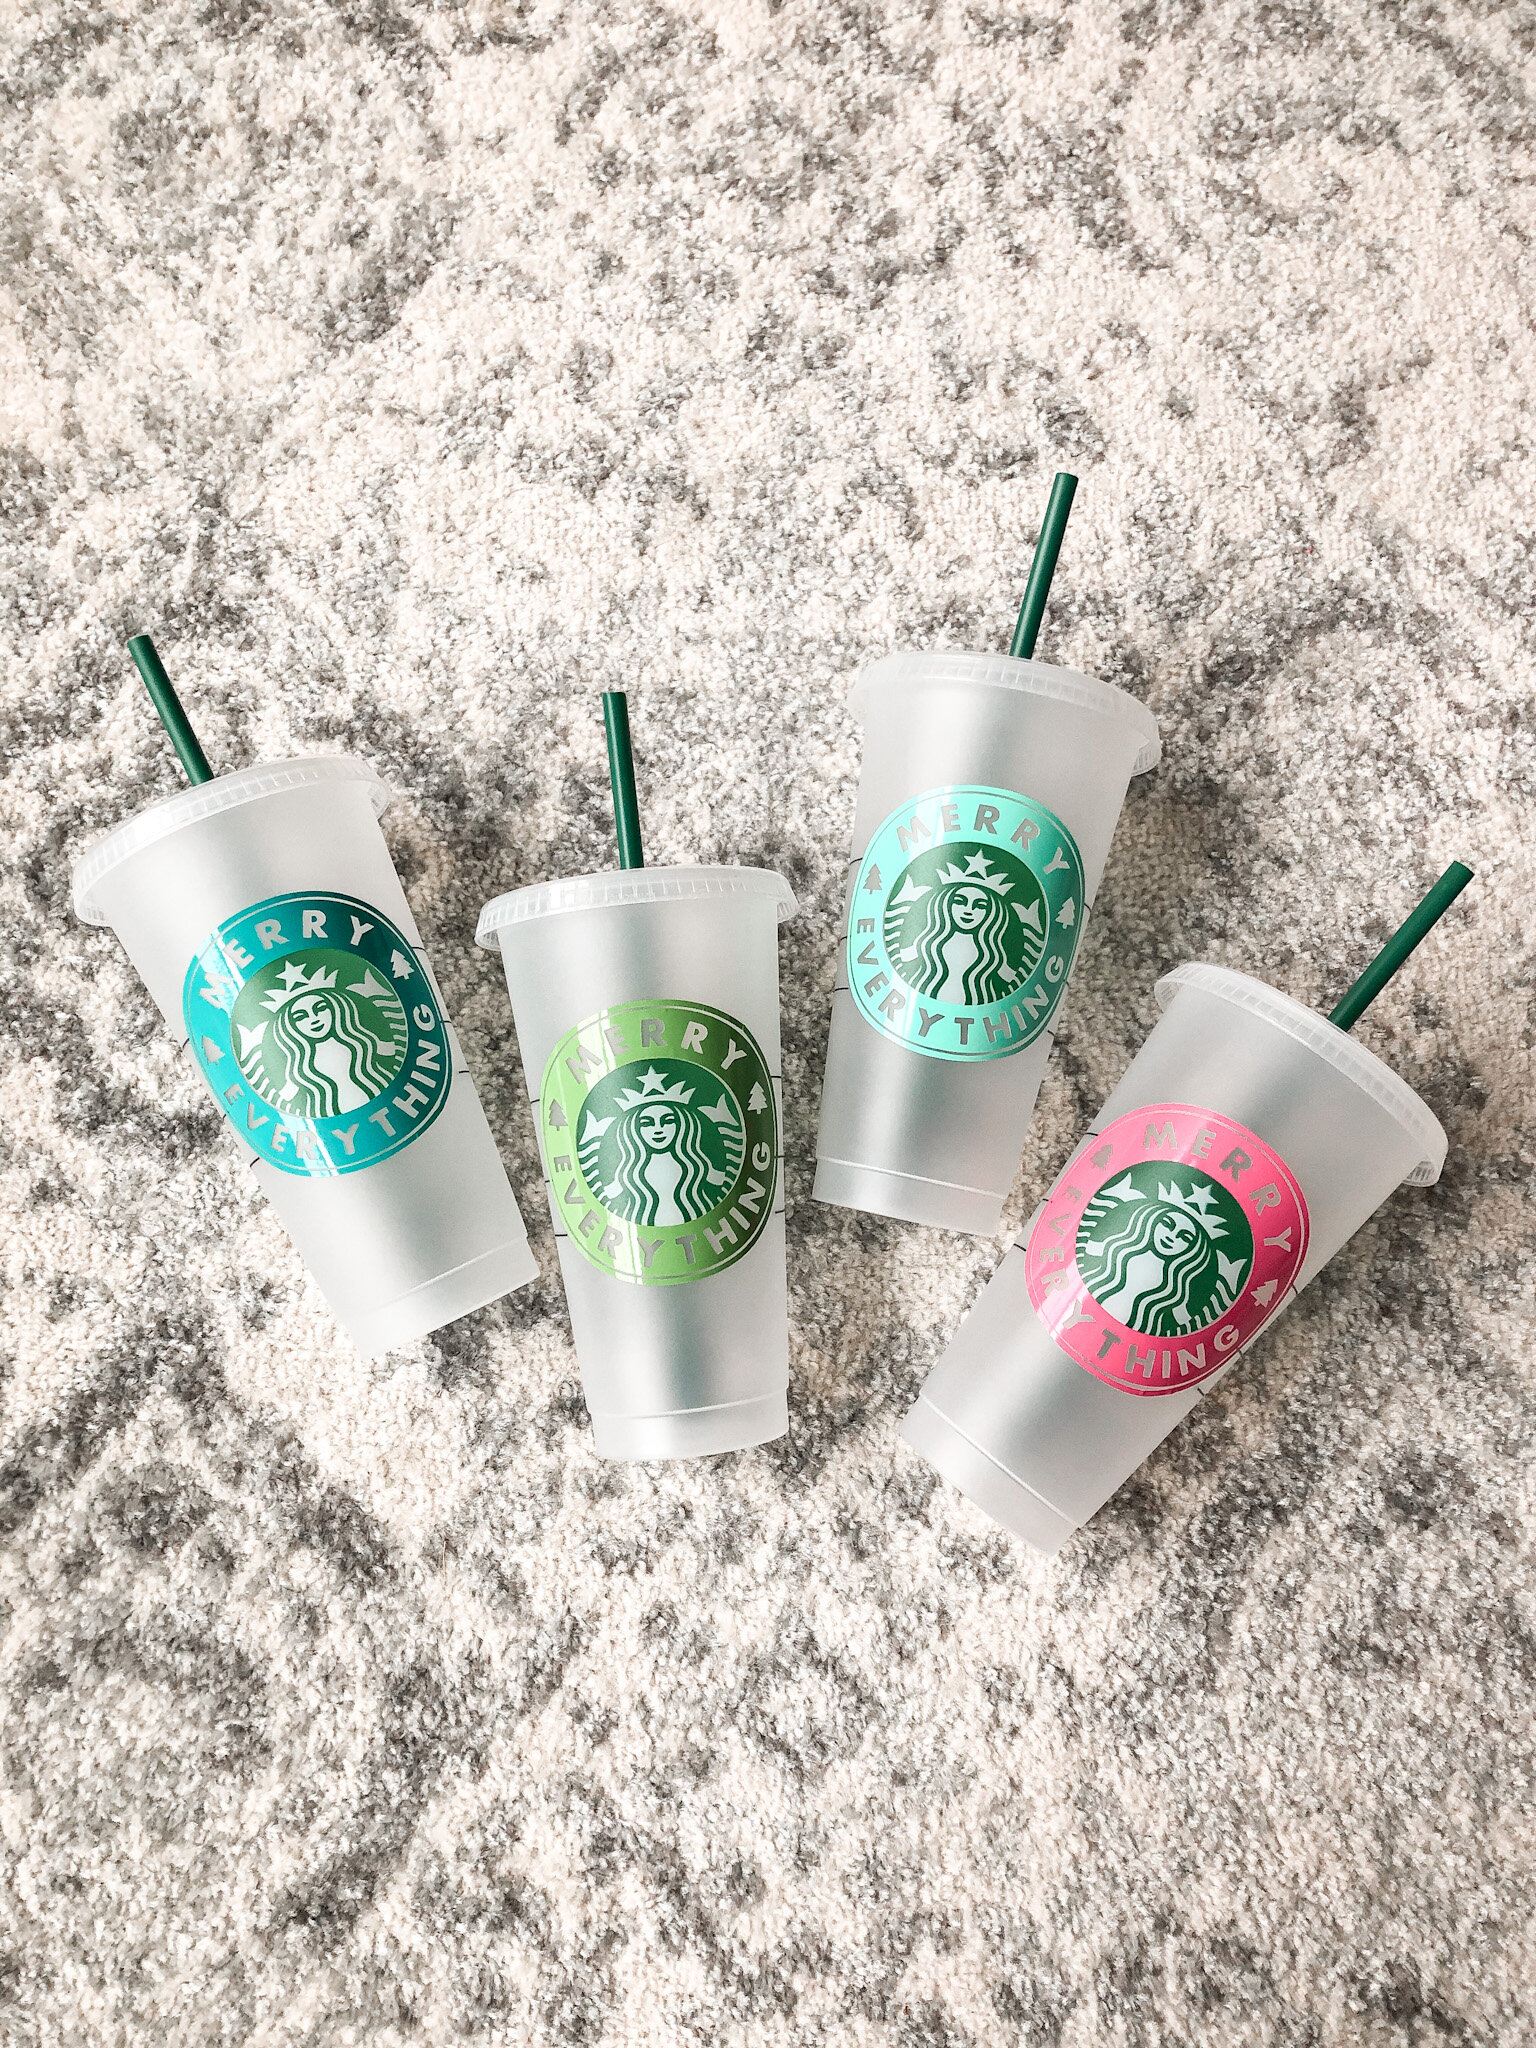
I’m so excited to share this simple Starbucks Holiday Cold Cup DIY with you! These are so easy and fun to create, and they make the perfect small gift or stocking stuffer for the holidays!
You can customize them a million different ways … but here’s a simple tutorial for how to make this design. I’ll also show you how to customize your own!
What You Need:
Starbucks cold cup (you can get them in store at Starbucks or use these on Amazon)
Permanent Adhesive Vinyl (I used this kind from Expressions Vinyl)
Cricut (or similar) craft cutting machine. I have this one.
Basic tool set for weeding & scraping
Step One: Design
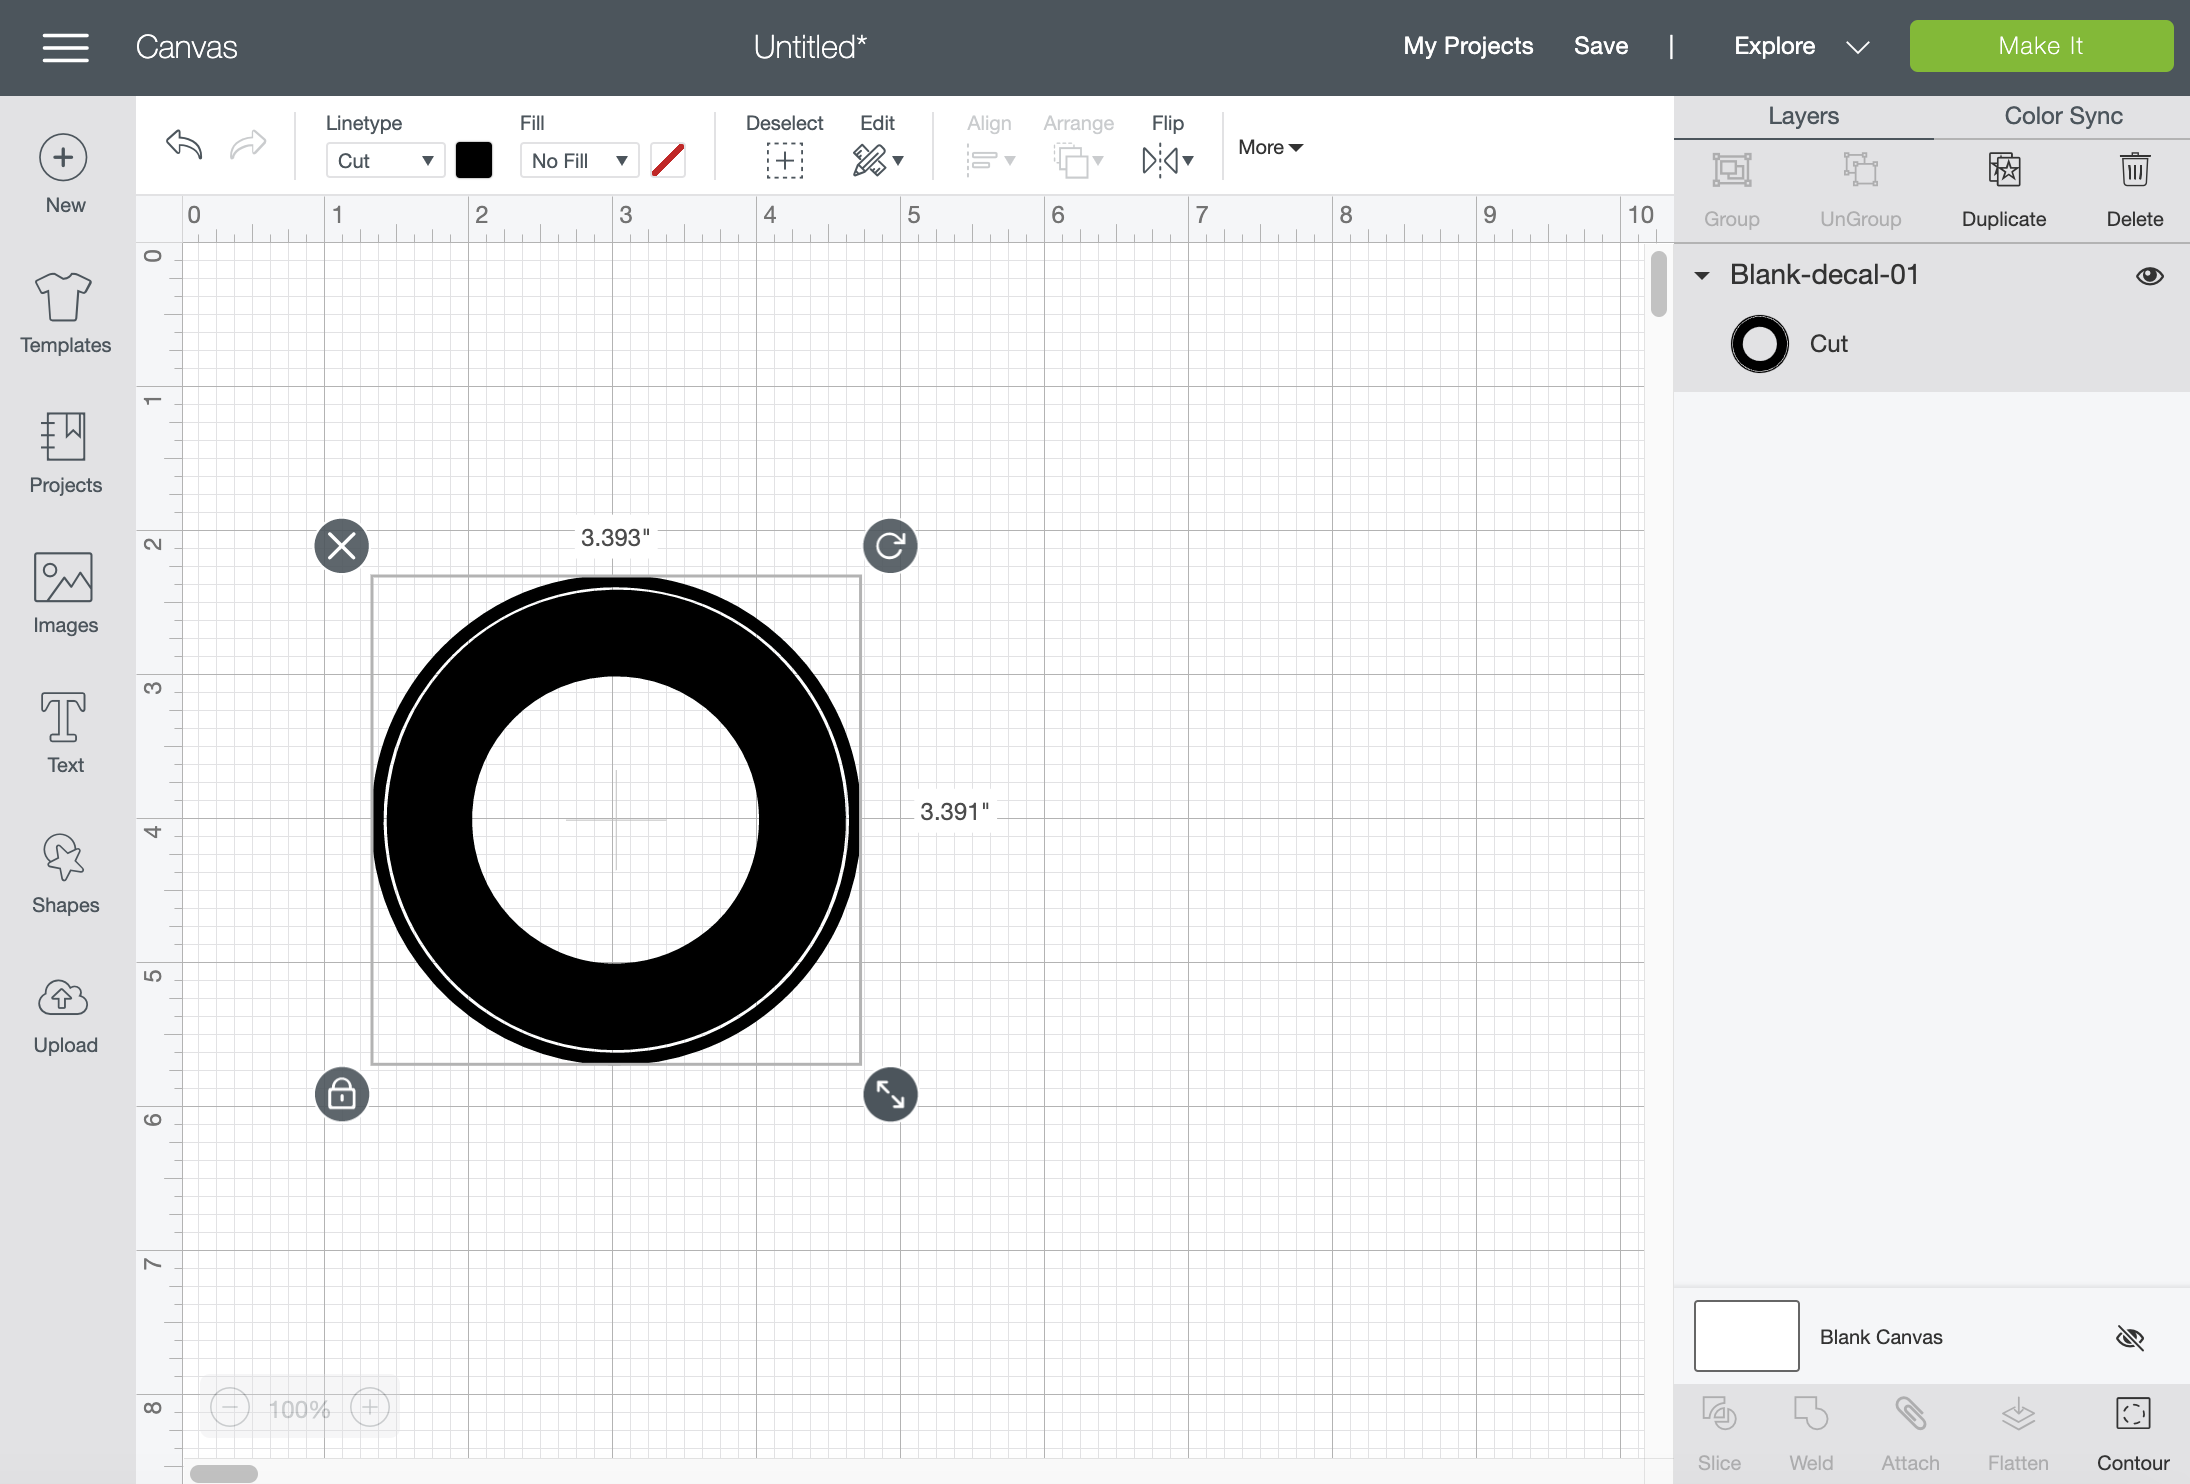
Start by uploading this blank circle design to Cricut Design Space (you can grab it on my Freebies page!). If you’d like to keep it quick and skip customization, you can upload my Merry Everything SVG or your own pre-purchased one from Etsy.
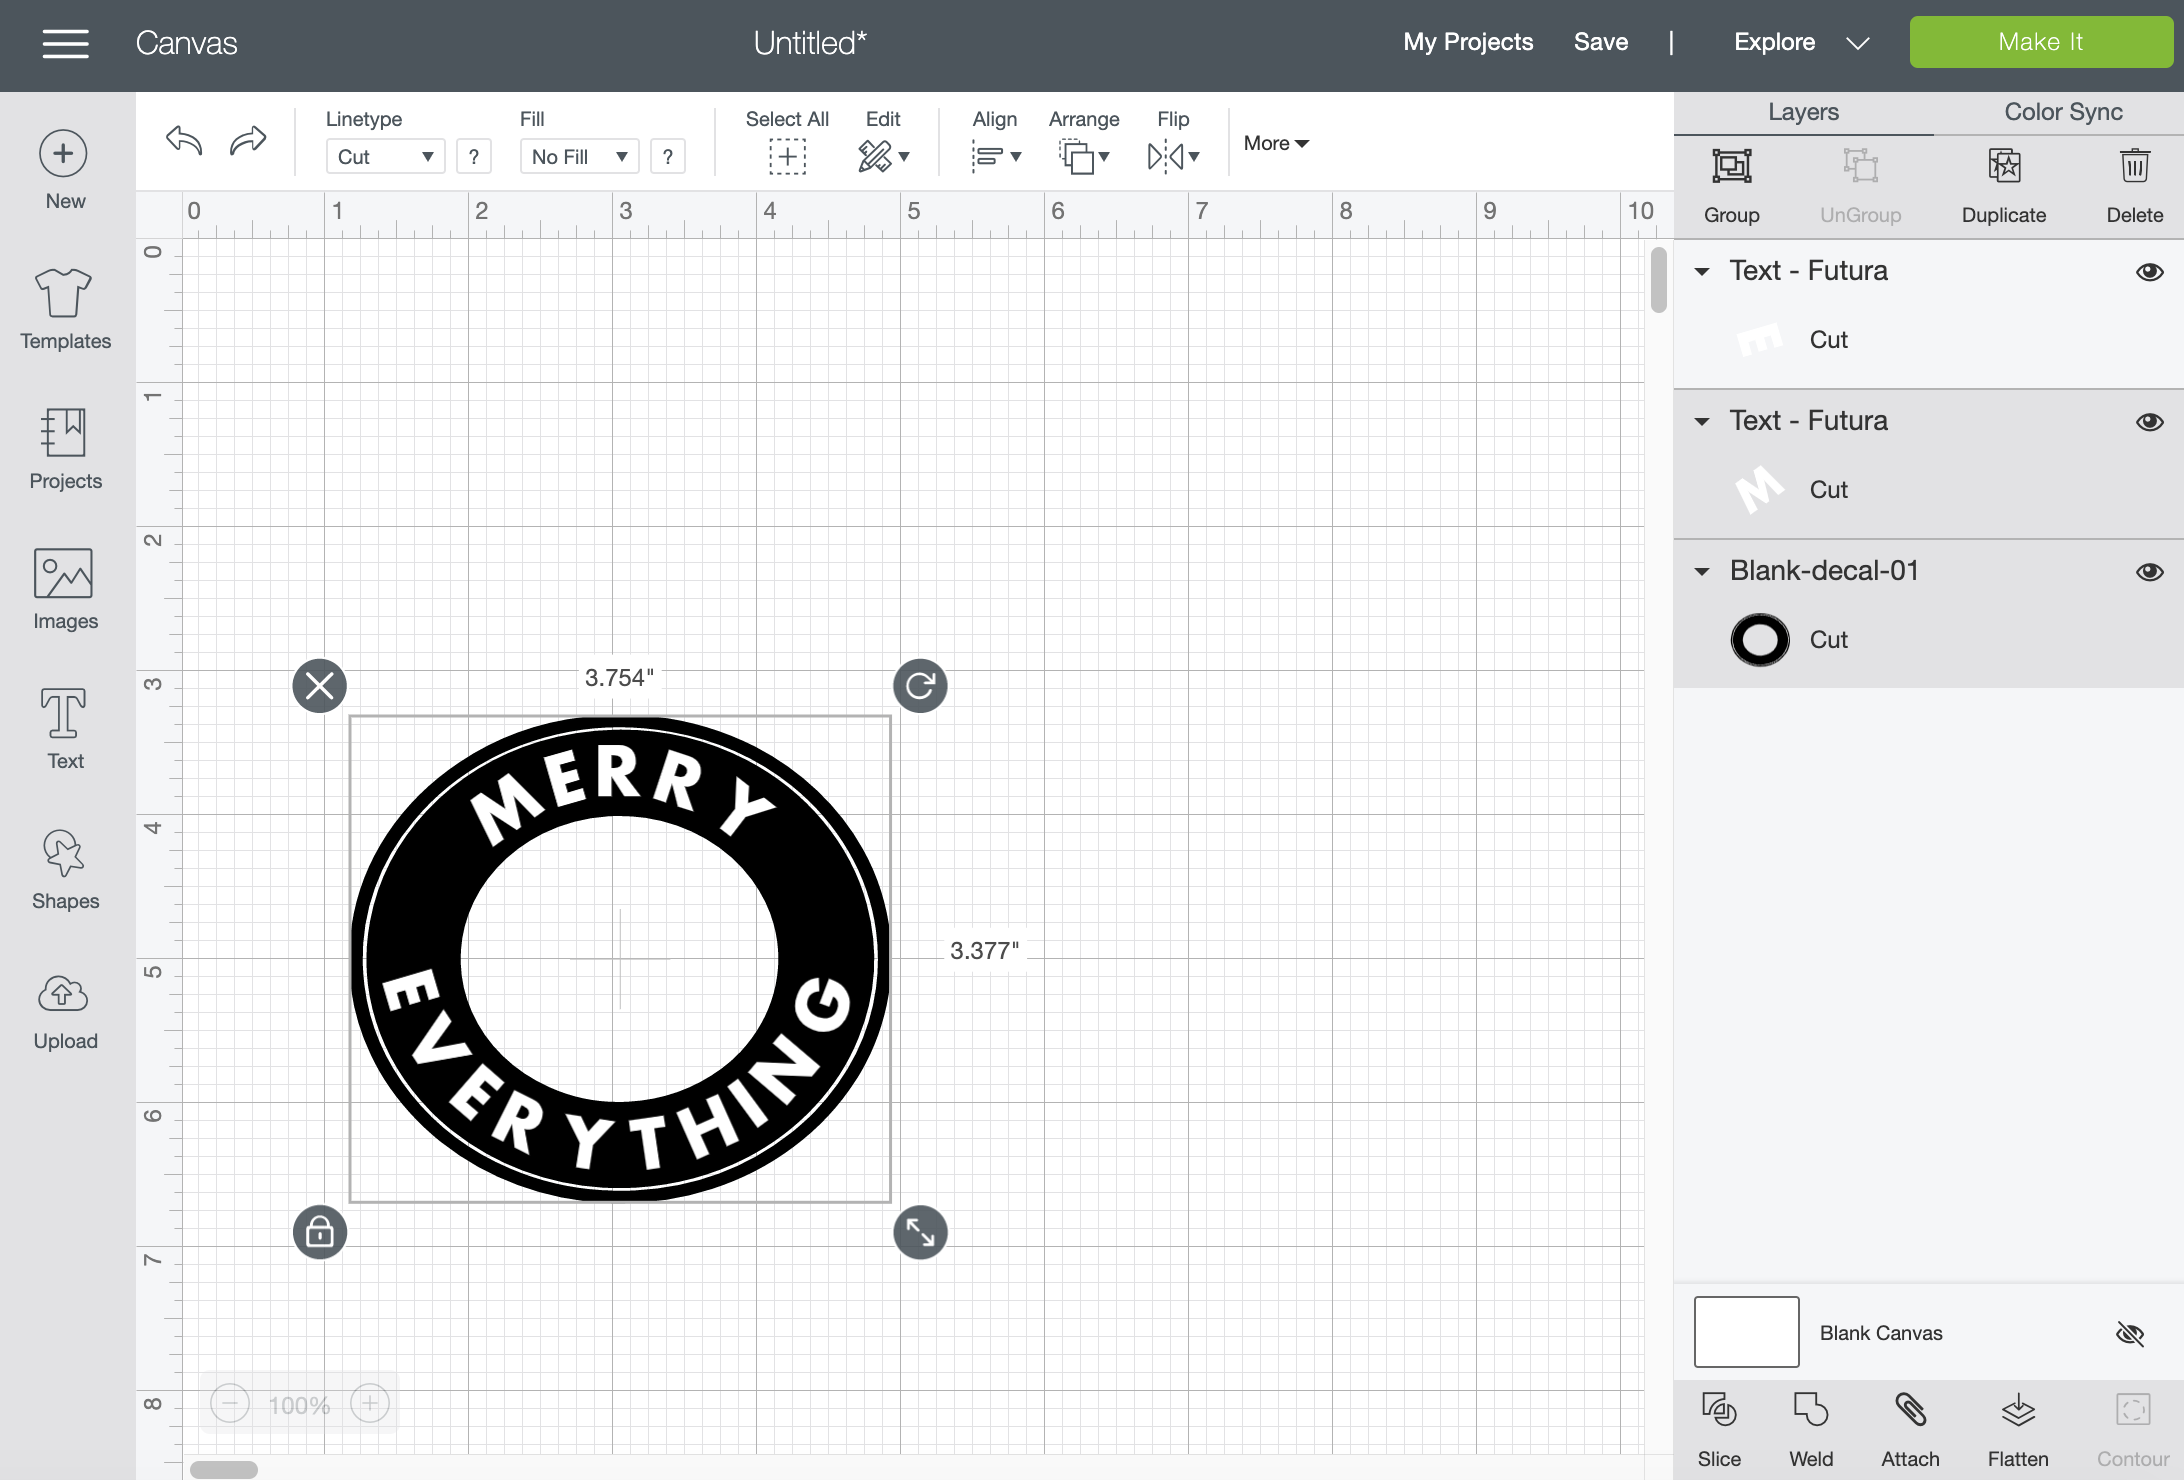
Start by adding text to your Canvas — simply click the Text tool to the left and type what you want.

I have found that the Futura font in Bold most closely matches the original Starbucks logo. Type the words you want along the top and bottom, and then adjust your fonts.
Next, we’ll use the Curve tool to adjust the size and shape of the letters. You can control how narrow or wide the arc is by adjusting the diameter.

Next, we’ll begin slicing the design so that the text cuts through the circle. Right now it’s just white text on top of the circle. You want this design to be completely transparent to work with.
Select the text box around “Merry” and select the circle design together. You’ll see both highlighted in your layer bar on the right.
While both layers are highlighted, click “Slice” at the bottom.
You’ll notice the text slices through the circle, and you are left with 2 new additional layers. You won’t need these layers, so click the eyeball icon on the right of these layers to make them disappear.
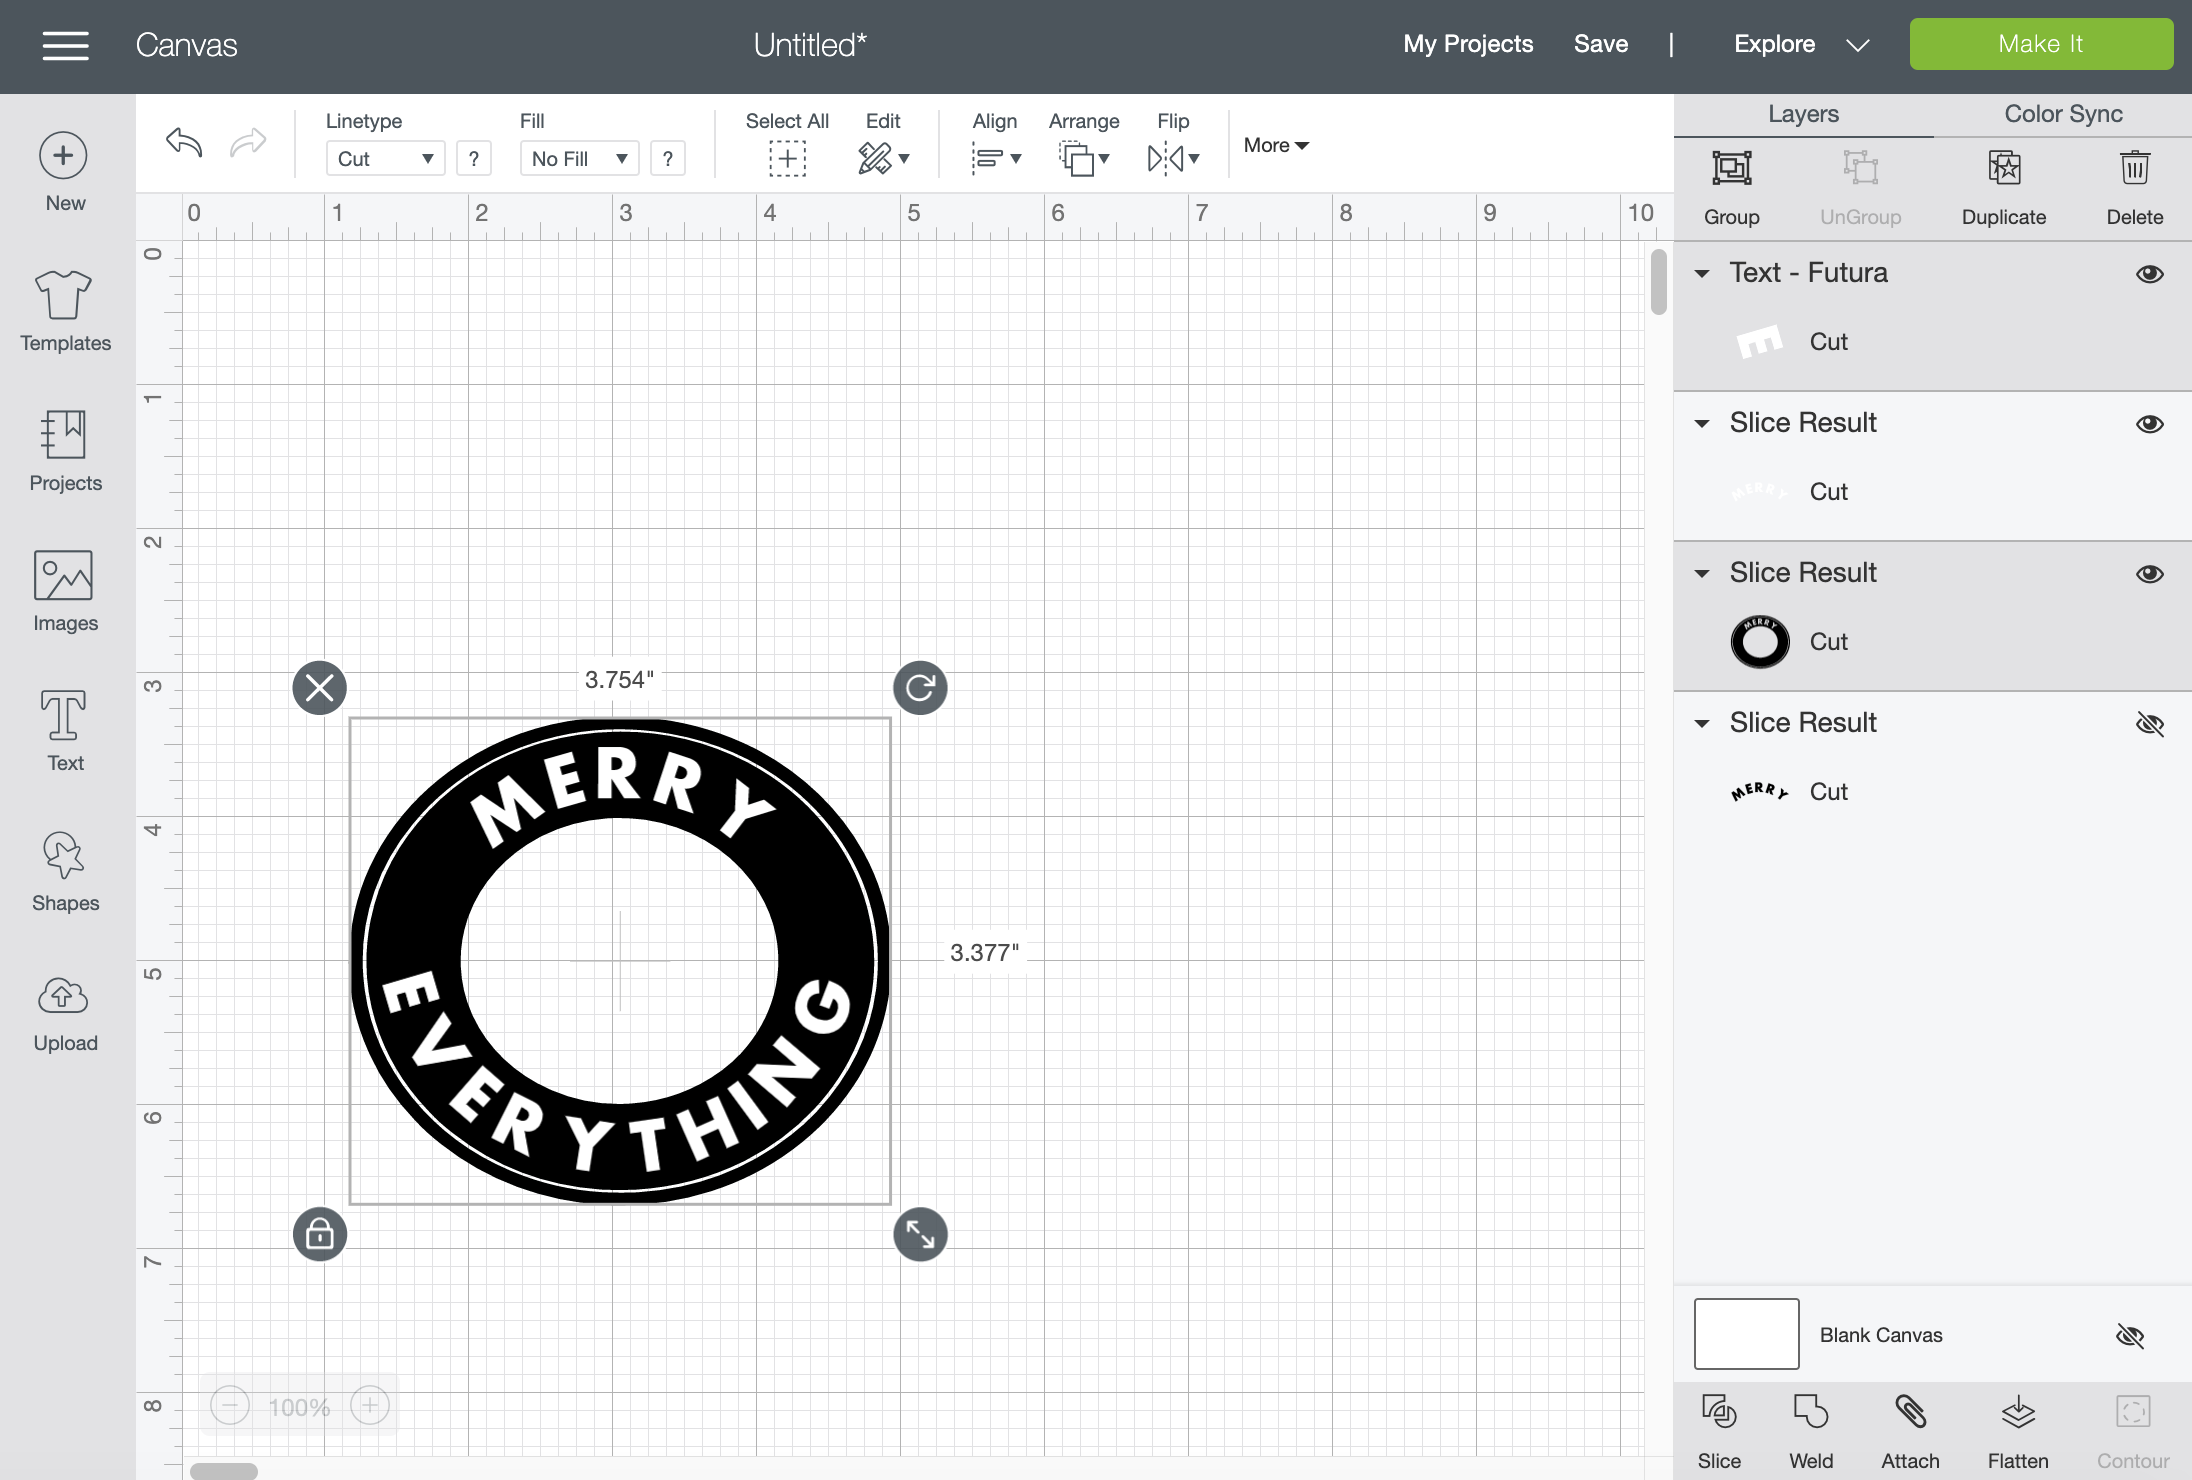
Repeat the steps above & slice the lower text layer.
Now you’re left with the circle design and your text all sliced through! Hooray! We’re almost done.
Click the “Shapes” tool on the left to scroll through a handful of pre made shapes to add. You can also choose to upload your own design. I uploaded a simple evergreen tree.

Resize your shapes to fit in the circle & slice through just like you did for the text.

Now we are left with the design & all we need to do is cut it out!
Step Two: Measure
Starbucks cups are NOT perfectly circle. They’re actually a little wider at the sides. Depending on where you ordered your Starbucks cup, it may or may not be the exact same size as mine. Make sure you measure your cup.

Mine is exactly 2 inches from top to bottom, and 2.25 inches wide.
Adjust your circle in Design Space to match your cup. We’ll use the gridlines in the Canvas to match. Each square is 1 inch, so we are just going to adjust the inner circle of our design to match the size of our cup circle.
I’m lining up the very top of my inner circle in the center of the 3” mark, and I’m shrinking my circle to be exactly 2 grid blocks tall … aka 2 inches tall.

Next, we’ll click the little lock icon on the bottom left to “unlock” the shape … this allows us to stretch the circle. Stretch your logo to 2.25” like mine, or whatever the exact width of your cup is. Be sure to keep your height 2”.

Once it’s perfect click the “lock” icon again to save the shape and move it to the top left corner of your Canvas. Click the green “Make It” icon at the top.
Step Three: Cut
Cut your vinyl to size and load it on your cutting mat into the machine. Now watch your Cricut do all it’s magic!
Once it’s cut, weed your vinyl and apply it with transfer tape to your cup. Remove the transfer tape and voila! You did it! Watch the video below for details:

If you try this DIY I’d love for you to share a picture over social media using the hashtag #brittanylettering! For even more ideas, follow @brittanylettering, @officialcricut, and @expressionsvinyl over on Instagram!
Be sure to head over to the Etsy shop to find even more fun designs for your holiday projects!
Happy crafting!
XO Brittany